1200+ Font Pack:
http://www.moviemakers.nu/?p=tutorial&id=38
Other Font Websites:
http://www.1001freefonts.com
http://www.dafont.com
http://www.acidfonts.com
http://www.simplythebest.net/fonts
http://www.1001fonts.com
http://www.fontfile.com
Renders:
http://files.filefront.com/Rendersrar/; ... einfo.html --- All of my renders.
http://www.clantemplates.com/renders/gallery/
http://www.gamerenders.com/forum/index. ... le=gallery
http://www.gfxgamers.net/gallery/index.php?cat=6
http://www.dilutedfx.com/index.php?s=fd ... owforum=47
http://www.gaming-memories.com/game-art.php
http://www.bungie.net/Games/Halo2/galle ... ers&page=1
http://perfectdark.3dactionplanet.gamespy.com/renders/
http://forums.fevergaming.com/archive/i ... f-344.html
Brushes:
http://veredgf.fredfarm.com/vbrush/main.html
http://www.echoica.net/
http://www.dubtastic.com/resources.php
http://www.angryblue.com/downloads.shtml
http://www.deviantart.com/
http://www.deviantart.com/deviation/14489074/
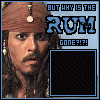
http://www.deviantart.com/deviation/14456696/
http://www.photoshopbrushes.com/
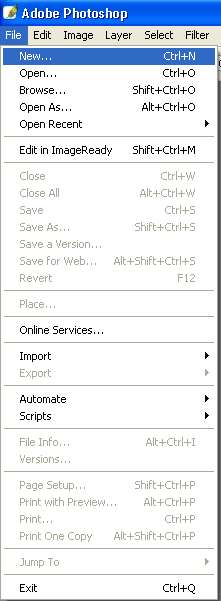
1. Open PhotoShop through a PhotoShop icon or .exe
2. Hit File->New
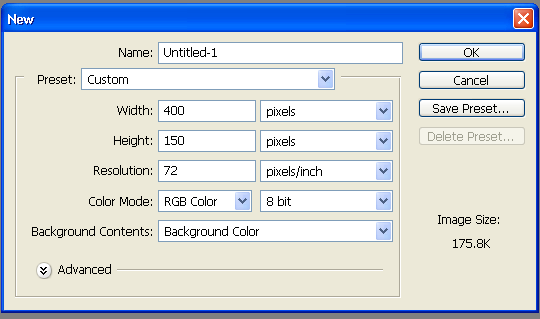
3. Apply these settings or 500x150 for signatures on this forum.
4. Now Click your paintbrush icon.

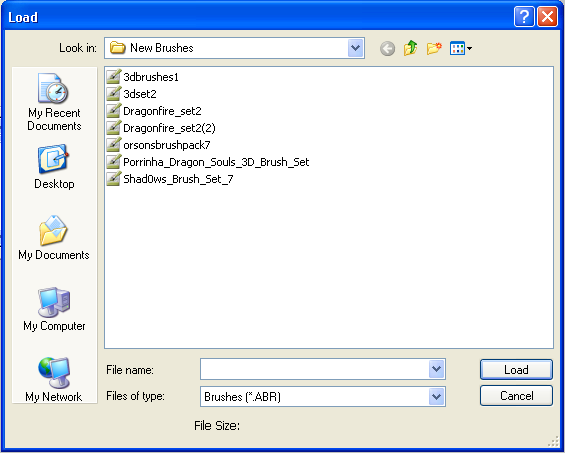
5. Now to upload those brushes you have just downloaded (brush part coming soon).
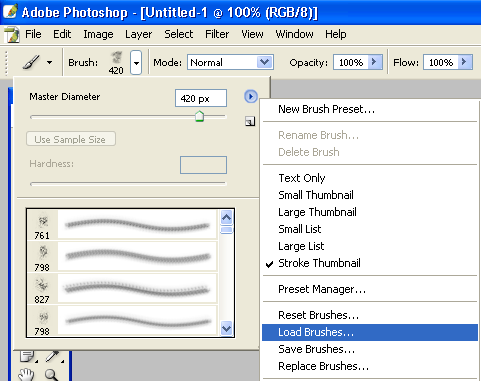
6. Here is the loading screen that pops up, you can only upload 1 set at a time a set can ave from 5-100 brushes.
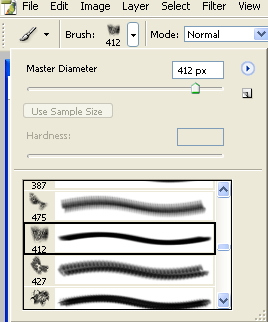
7. Then choose one of the brushes that we just downloaded.
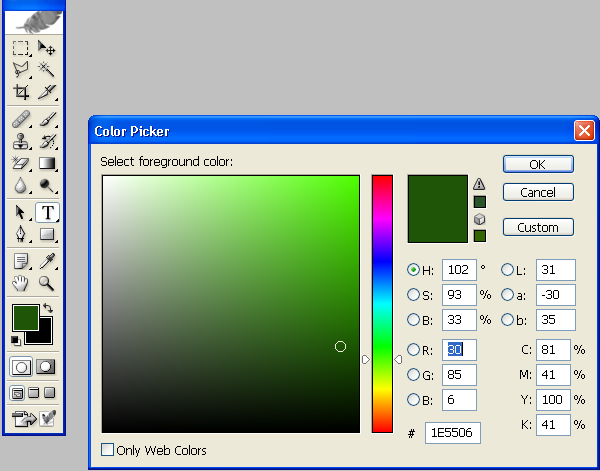
8. Now you must choose a color to brush with.

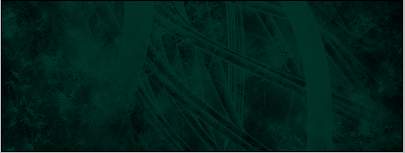
9. Now brush a nice background with MANY different brushes (it makes it look better, i just made a 20 second brushing scheme just to show you).
10. Now we must add a render (a picture that belind with the background).
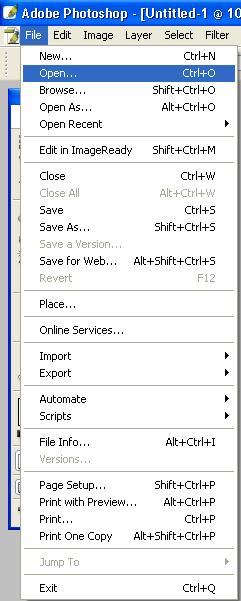
11. So we hit File->Open and open one of our previousley downloaded render packs and find a nice matching render.
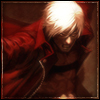
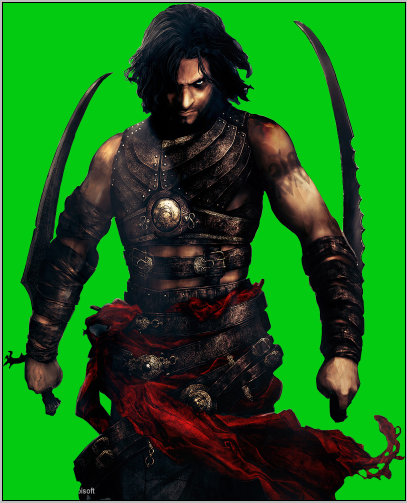
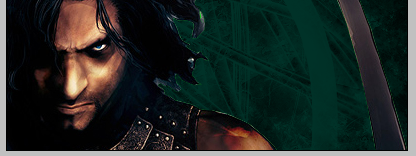
12. I chose this one.
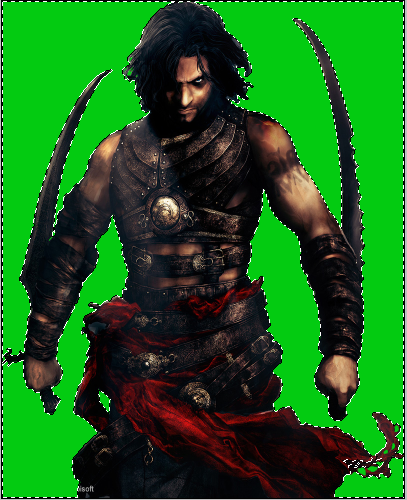
13. Now we must crop the image off of its background and copy it to the background we have just made, so we will need our magic wand tool.

14. Now how Shift and Click around the edges of the render and when you have the whole render outlined it should look like this.
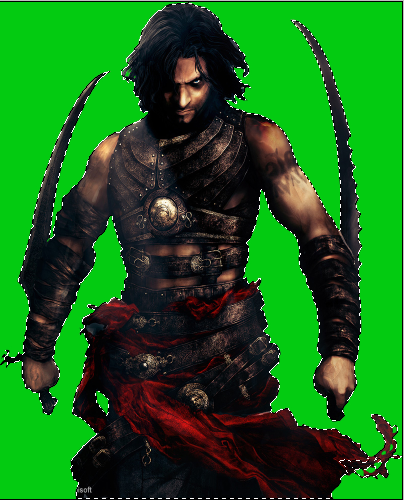
15. Now we must select what you have just done so use these settings.

16. Now it should look like this.
17. Now hit Ctrl+C and copy it and then close the render document and hit Ctrl+V on the background we have made. And you your basic moving tool to move the image into the spot you would like it to be.
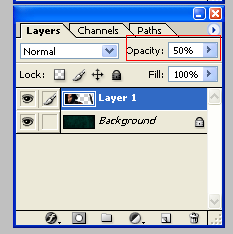
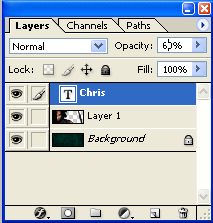
18. Now you may want to blend your render in (the easy way, for beginners). So you should mess with the opacity settings on the bottom right hand corner.
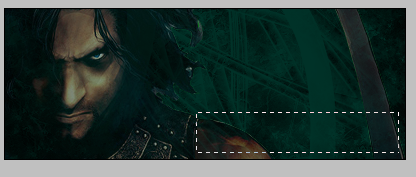
19. Now we must add some text. First we need our text box tool.

20. Now make a text box.
21. Now find the size and font that you want to put in (try some of the ones we have previousley downloaded)

22. Now write what you want select the text and choose a color that will match the background.
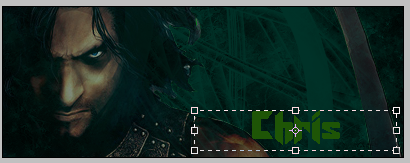
23. It should now look like this (for my name
24. Now again, you may want to blend it again, so you may use the basic opacity way.
25. And move your text into the spot you want it, with the movement tool.

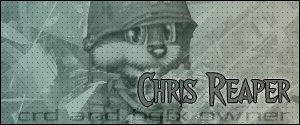
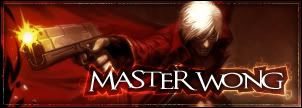
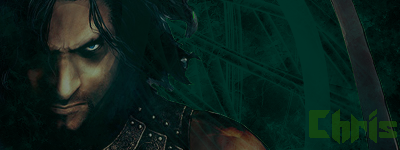
26. And here was my quick end result.
Thank You,
Chris
Please post how yours comes out and also comment my tutorial and critique it.